Showing posts with label Fret Dots. Show all posts

Monday, 30 June 2014

DLP Lap Steel Guitar - 6 - Finishing the Fret Board

During the week I have been working on the fret board for the DLP Lap Steel Guitar.  I had decided to use cream binding to mark the positions of the notes but the thickness of the binding meant I would have to slot the board first and then file each groove to the correct width of about 1.5mm.


This turned out to be a rather laborious process to say the least!  I uses a fine saw to initially, then a slightly less fine saw and finally 2 different size files to get the slots to the perfect size.  I then cut strips of binding slightly oversize and glued them all in position.


With all 24 slots filed to size and the strips glued in place using super glue, I left them to set overnight before trimming them flush.


I'm sure there is an easy way of trimming the fret marker flush but I once again chose the difficult labour intensive route and filed each one close to the fretboard been careful not to damage the fretboard itself.


Once I got close I used a spirit level with sand paper attached to one side with double sided tape to level and then flush the markers.  Once again this was a laborious task but I'm starting to see light at the end of the tunnel.


With the top flush I trimmed the side as near to flush as I could and then sanded then edge smooth.


There was a little filling to be done so I melted some spare binding in thinners and pasted into the gaps and then filed everything smooth once it had set.  Next I marked out positions of the fret markers.


I'm using green abalone for the first time.   I drilled the holes as carefully as possible and used super glue to secure them and then sanded everything flush using progressively finer grades of sand paper.


 They came out perfect and wont need any additional filling as the holes I drilled were all perfect!   Finally I clamped the fret board to the body and used titebond carpenters glue to secure everything in place.


Next I will round over the back for comfort and more onto installing the electronics so i can test everything before applying a finish... Danish Oil?


Monday, 31 March 2014

DLP Mandolin - 8 - More Neck Work

The neck on the Mandolin will be fixed and glued into place, there is a tenant under the top cover which will be hidden but I need to cut out a pocket in the top cover to accommodate the rest of the neck.  I laid this out and used a fine saw to cut inside the line giving me a nice clean edge.


I then carefully chiselled out the end of the pocket and then filed everything until I had a nice sung fit.  I had to attach the top to the body with double sided tape while I laid out the neck pocket.  


At this stage I don't want the top permanently attached as I still have to decide on the position of the volume and tone controls and need to glue the neck in place.  It's nice to see the instrument starting to look something like I imagined.  The proportions are great and the weight is nice although none of the hardware has been fitted yet.

 
I had a chance to use my new drill press this weekend as well when I drilled the fret markers on the top and side of the fret board.


I spent some time setting up the depth stop and carefully mounted the neck in my mitre block and drilled each hole using a 'lip and spur' drill bit which gives a nice clean round hole.


The drill press made short work of the holes in the top of the fret board and so I mixed some black epoxy putty and squeezed this into the holes and left it for 24 hours before sanding smooth.


I chose not to drill a fret marker for the 21st fret as the gap between the frets is just too narrow.  I think the dots look ascetically balanced anyway and a 4th dot above the twelfth fret might have made things look a little clamped.


The neck is now ready for fretting, I have cut the 21 frets ready to install and will get on with this over the next couple of days.  I can then shape the back of the neck, fit a laminate on to the top of the head and drill the machine head holes.  So still plenty of work to do!


Wednesday, 15 January 2014

DLP Les Paul - 4 - Continuing Work On The Neck


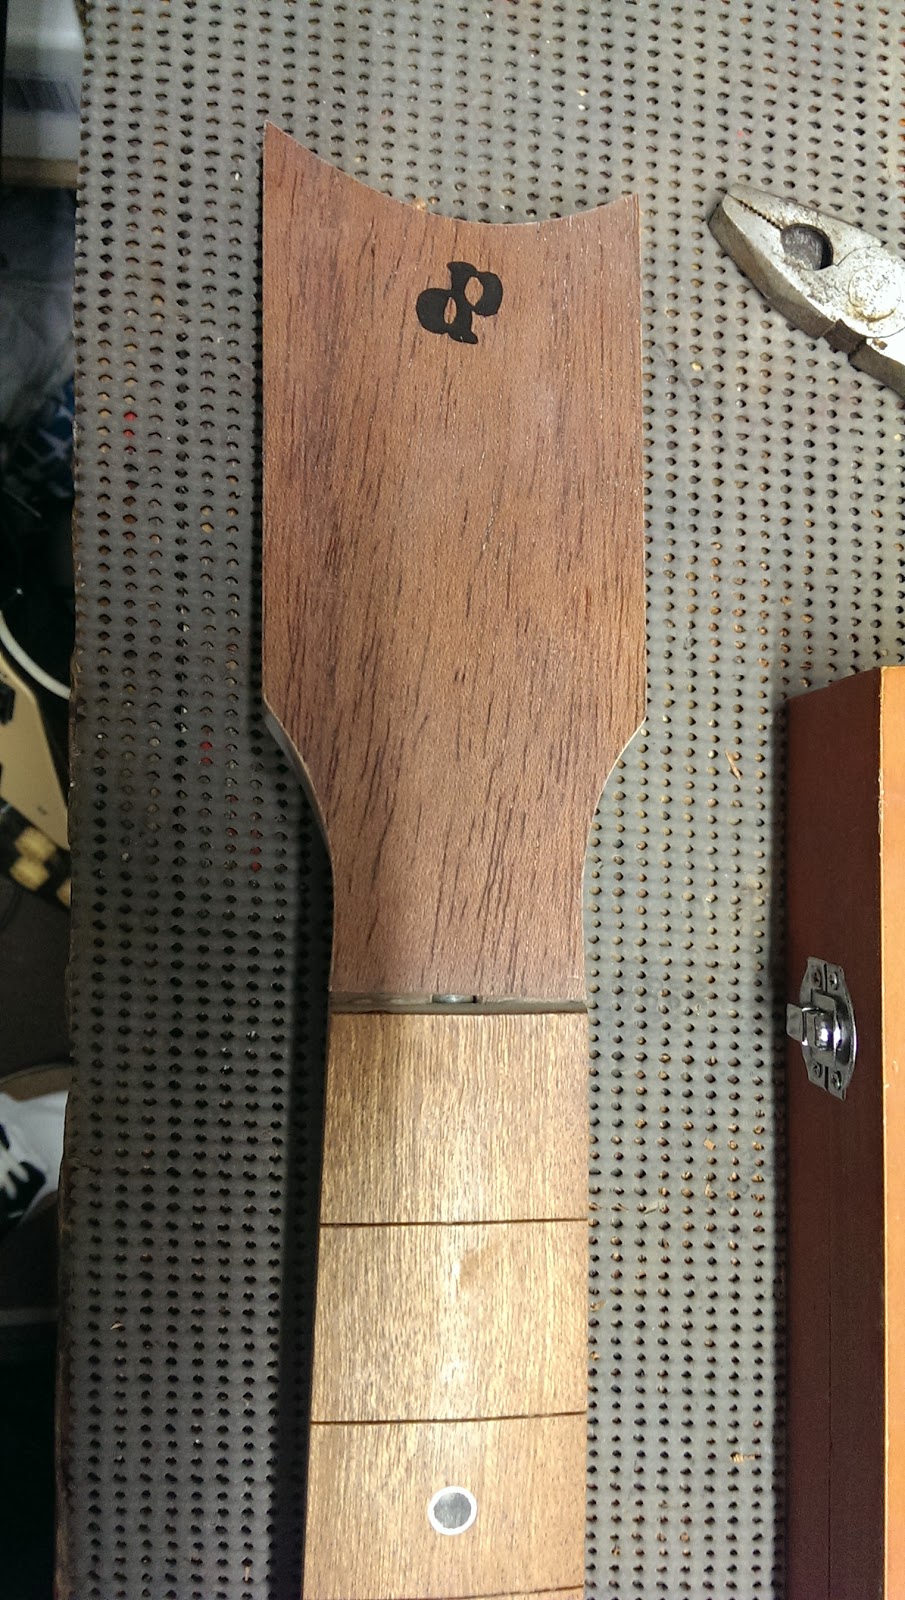
I have now added side fret markers to the DLP Les Paul neck, they are mode from the same epoxy as the markers on the top of the fret board.  I was very careful drilling the holes as I wanted them to come out crisp and sharp like the ones on top.


Next I made my first attempt at creating an inlay.  I took my logo and transferred an outline onto a thin piece of wood and used my Dremel to route away the materiel and then used the same black epoxy putty as a filler.  Once it had set for 24 hours I sanded everything smooth, applied a thin coat of wood stain and then a couple of coats of sander sealer to fill the pores.


I glued the piece to the head and then sanded the overhand smooth.  This makes the head about 16.5mm thick which is a little more than the 15mm standard so i will have to source some machine heads which will work with the thicker head.  I need to file out the slot for the nut and create a recess to allow access to the truss rod nut.

Thursday, 9 January 2014

DLP Les Paul - 3 - Installing The Fret Markers

Over the past couple of days I have continued work on the Les Paul neck concentrating on installing the two way truss rod and installing the fret markers.  As with the Telecaster neck I am also working on at the moment, I am going to fit black epoxy dots with a brass ring round them.  It both looks great and gives a nice clean edge to the dots.


I glued the mahogany fret board to the neck and left it to set overnight.  As usual I used most of my clamps in an effort to ensure a nice snug fit all round.


Once the glue had set I removed the clamps and trimmed the overhang with my plane leaving the fret board flush with the neck.  Next I marked out the positions of the fret markers and carefully drilled the holes paying particular attention to the edges of the hole to ensure there is no chipping leaving an unsightly and uneven circle.


Next I cut small sections from a hollow brass rod (I inserted a dowel into the rod whilst cutting it to ensure it did not deform).  I then tapped these into the holes adding a little superglue to the bottom of each hole for adherence.


Once the brass rods were glued in place and set I carefully filed them down a little, just enough to be about 2mm proud of the fret board.  I cleaned the inside of each of the rings removing any burrs and metal fragments.  I then mixed some black epoxy putty and pressed it into each of the brass rings.


Leaving this overnight to set I masked the fingerboard the next day so I would not damage it whilst filing the majority of the excess brass and epoxy away.  I used a file to remove the majority of the excess material.


Finally I set up my trusty neck profile jig and continued removing the rest of the excess with the same profile block I used to shape the fingerboard.  I started with 60 grit abrasive sand paper, then 80 grit and so on gradually using finer grades until everything was flush.


Once this was finished and everything was smooth and flush I started adding coats of sander sealer to the fingerboard.  Mahogany is not commonly used on the fret board because it is porous and soft so I need to apply some sort of finish before installing the frets.  There is also some question as to how well mahogany holds the frets but I will use superglue to ensure the frets do not pull out.


After some discussion with fellow luthiers I decided to finish the fret board with Tru-Oil rather than lacquer as I had originally intended.  I have been adding coats and then sanding them back with wire wool over the past couple of days and will continue to do this until I have a finish I am happy with and all the pores are filled.  I will then drill and fill for the side markers using the same epoxy and install the frets before shaping and carving the back of the neck.

Wednesday, 4 December 2013

Telecaster III - 16 - Fret Markers

I sanded down the epoxy which had set overnight to reveal nice black dots circled with a brass ring.  I could not be any more please with how these have turned out!


Maybe I need to source more of this brass rod.  The diameter is probably a tiny bit too large and shows up on the higher frets.  The final fret marker is too close to the fret slot for my liking.  However I think the brass adds a little bit of sparkle and quality to the neck.


Tuesday, 3 December 2013

Telecaster III - 15 - Cutting The Fret Slots And Fret Markers

It took a couple of days and some new sand paper but I'm now happy with the neck profile.  My block and jig worked a treat and I have a nice radius on the neck now.

The next step is to mark up for the fret slots.  I have another neck so i will transfer the measurements directly from that neck to this one.


With everything marked up I drew a line along each side of the neck 2mm from the face, I can cut the slots all to an even depth then knowing there slot will be deep enough for the frets.


I have a set of pre-cut frets and the tang has already been trimmed at each end so I will fill the ends and want them to be nice and even.


I use my mitre box and wedges to line up the neck for each fret and start each cut and then take the neck out of the box and finish the cut on the bench.  I can control the depth perfectly then.


Once all the frets are cut I mark up for the fret markers. I have been using black epoxy for the markers.  I like the look but the hole has to be perfect otherwise the edges can be a little fuzzy so I found some brass tube in the garage and cut 10 pieces out and inserted them in the holes.  These should give a nice clean line and a little bit of a shine!


Tomorrow I will sand the epoxy smooth once it has had chance to thoroughly set.  there is a chip that needs filling under the last fret as well and plenty more sanding to do, but I'm excited about this neck now and cant wait to finish it off.


Monday, 3 June 2013

Telecaster Two - 8 - Fret Markers

I have laid out the marks for the fret markers tonight and then had a look around the garage for inspiration trying to decide what to use as the markers. I was hoping to find some extruded cylindrical plastic or something but I didn't have much luck.  Then I noticed some aluminium tubes and thought about sinking a ring of aluminium and filling it with wood filler or something however the diameter of the tube was too wide for the upper frets! I will store the idea though...


The I noticed a jar on the shelf full of dowels about 4 inches long. Some of them looked like dense hardwood like maple so I decided to use them.  The diameter was fine for the upper frets so I drilled all the holes to the exact diameter of the dowels, dropped a little super glue into each home and tapped in a small piece into each hole leaving a portion standing proud to cut off and sand down later.


I cut the last two almost flush to the neck and then sanded them smooth before I realised that it was past midnight and I had better get off to bed as I have work tomorrow morning.


I think the two I have sanded flush look fantastic and certainly give it that 'handmade bu a craftsman' look!