Monday 30 June 2014

DLP Lap Steel Guitar - 6 - Finishing the Fret Board

During the week I have been working on the fret board for the DLP Lap Steel Guitar.  I had decided to use cream binding to mark the positions of the notes but the thickness of the binding meant I would have to slot the board first and then file each groove to the correct width of about 1.5mm.


This turned out to be a rather laborious process to say the least!  I uses a fine saw to initially, then a slightly less fine saw and finally 2 different size files to get the slots to the perfect size.  I then cut strips of binding slightly oversize and glued them all in position.


With all 24 slots filed to size and the strips glued in place using super glue, I left them to set overnight before trimming them flush.


I'm sure there is an easy way of trimming the fret marker flush but I once again chose the difficult labour intensive route and filed each one close to the fretboard been careful not to damage the fretboard itself.


Once I got close I used a spirit level with sand paper attached to one side with double sided tape to level and then flush the markers.  Once again this was a laborious task but I'm starting to see light at the end of the tunnel.


With the top flush I trimmed the side as near to flush as I could and then sanded then edge smooth.


There was a little filling to be done so I melted some spare binding in thinners and pasted into the gaps and then filed everything smooth once it had set.  Next I marked out positions of the fret markers.


I'm using green abalone for the first time.   I drilled the holes as carefully as possible and used super glue to secure them and then sanded everything flush using progressively finer grades of sand paper.


 They came out perfect and wont need any additional filling as the holes I drilled were all perfect!   Finally I clamped the fret board to the body and used titebond carpenters glue to secure everything in place.


Next I will round over the back for comfort and more onto installing the electronics so i can test everything before applying a finish... Danish Oil?


Tuesday 24 June 2014

DLP Lap Steel Guitar - 5 - Fitting The Hardware

Last night I started laying out for the jack socket, the jack will enter the volume and tone cavity and I know it will be a tight fit but after some careful measuring I know everything will fit OK.


I drilled a 22mm hole into the cavity and test fitted the pots and jack socket just to double check and there is enough room for all the wires.  Next I drilled a hole between the control cavity and the P90 cavity for the pickup loom to pass through.


Everything fits comfortably, the pickup cavity is very tight and will need a little sanding before final assembly.


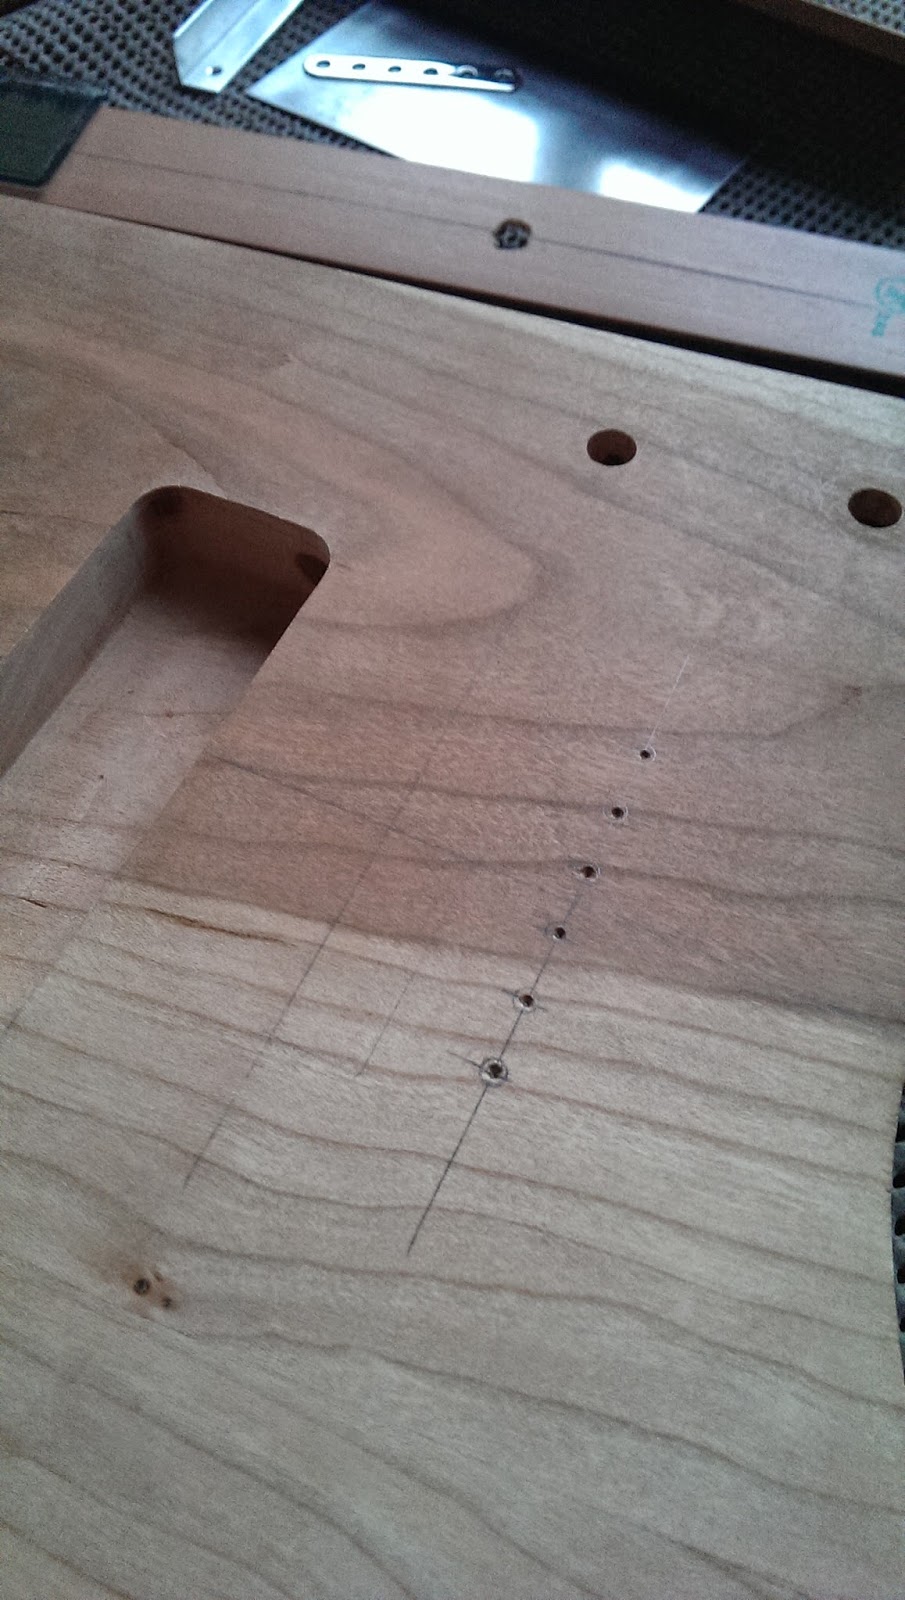
I then marked up the 6 holes for the strings to pass through as I have decided to have through body strings.  I used a centre punch to make an initial mark then over to the drill press to make the 6 holes.  I just about managed to find a bit that was both the desired diameter and long enough to go all the way through the body.  I barely let the drill bit pass through the body to avoid splitting the back and then drill through from the back to give nice clean holes both sides.


I then set the drill press up to drill a hole in the back large enough to hole the six string ferules, they needed to be flush with the back of the body so as not to rub on the players legs.


On the top of the guitar I screwed a piece of mecano which happens to have six holes spaced almost exactly the same as the P90 poles.  This will stop the strings wearing away the wood at the point where they enter the body and I think it looks kind of cool as well!  I also drilled a couple of holes to mount the bridge and nut.


My final job for the night was to fit the machine heads, I reamed the holes to the correct size and test fitted all six tuners.  I need to sort out the slots on the fingerboard, I plan to glue binding into each of the slots once I've found a way to cut the slots to the correct size.  Then the fret board needs to be attached and I'm ready to string it up.


Monday 23 June 2014

DLP Lap Steel Guitar - 4 - Some Cavity Work

Having shaped the head angle recently I decided to move on to routing cavities for the pickup and electronics.  I was also wanted to make a bridge and nut out of a piece of 12mm  by 12mm aluminium angle.


I started with the bridge and nut by cutting two lengths of aluminium to size and rounding over the corners before drilling and countersinking 2 holes in each piece. I then polished the two pieces and they are ready for slotting for the strings.


Next I marked and drilled two holes for the volume and tone pots. I plan to keep the control cavity as small as possible.  Its a thick piece of wood to drill through but the drill press made light work of the task.


For the cavity cover itself I made a cover from a piece of copper printed circuit board what hasn't yet been etched.  I cut out the shape by hand then refined the edges on the drum sander attachment on my drill press.  I then drilled two holes and countersunk them before making a router template to create the cavity.

 
I want the cover to sit flush or slightly below the back of the guitar so I made an oversize template and then used the collar attachment on the router to guide the cutting bit.  The template was 2.5mm oversize, the exact same size as the gap between the outside of the collar and the edge of the cutting bit.


The template cutter and oversized template made a for a nice easy, clean route.  What this doesn't demonstrate is just how long it takes to create a simple template like this, however in the long run it should pay off.


The indent for the cover routed beautifully, it sits just below the back of the guitar which is exactly how I wanted it to turn out.  Cherry is a hard wood but lovely to route and machine.  I routed the rest of the cavity using another template and finished it off with a sharp chisel as the router bit would not reach all the way down.  The pots sit perfectly at the bottom of the recess with just enough clearance for the wires.


Next I made another template for the P90 pickup cavity, well I actually already had a P90 template but I spent some time refining the inner edges to ensure the router runs perfectly smoothly over the edges, this time I will be using a router bit with a ball bearing on the shaft which will transmit every imperfection to the cavity edges.


Initially though I drilled as many holes as I could on the drill press to reduce the amount of material the router has to remove.  With the drill bit set  stop at a predetermined depth I could ensure all the holes would be the same.


Then I used double sided tape to secure the template to the top of the guitar and carefully routed away the remaining wood in a couple of passes.  I think the result was perfect, and the pickup slides in beautifully with the minimal amount of clearance around the edge.


The top is finally starting to look like something special now.  My final job this weekend was to drill the six holes for the machine heads.  There is a little chip out at the back but the machine heads should hide that anyway.


Tuesday 17 June 2014

DLP Lap Steel Guitar - 3 - Carving the Headstock

Continuing with Lap Steel Guitar no.1 I started to shape the headstock.  I want the headstock to lean back giving the strings a fall back like on a traditional scarf jointed headstock.  Working within the restraints of the thickness of the wood I was able to mark out a 10 degree angle for the headstock.  I decided to chisel the excess wood away from the headstock, ideally I should have cut this on my band saw while I still had a straight edge before I cut the body out but there is nothing wrong with a little hard work and it's good practice!


Taking my time and working with the grain I started to chisel away the excess material from the face of the headstock, when I started to get close to the line I used a small plane to start to level everything up.


Once I was happy with the face I started on the back of the headstock, initially I carved the transition between the neck and the back of the headstock and gradually shaved away the rest of the material to make a smooth neat transition.


I then used a course sandpaper on a flat block to remove unevenness and then finally went to work with my cabinet scraper to leave a nice smooth finish.  I will be rounding over the edges on the back of the neck and body, I haven't decided if I will do this on the top of the body as the shape of the body is all about strong sharp lines.  The back edges will be rounded over for comfort only.


The mahogany fret board will give a nice subtle contrast to the cherry body, once I have drilled the machine head holes and routed the pickup and control cavity I will be ready to glue it on.


I plan to install a P90 pickup and use a piece of aluminium angle to make the bridge and nut and then have the strings go through the body.  I found a piece of Meccano which has hole spacing almost identical to the poles spacing on the pickup so my thought is to have this recessed in the back of the guitar to retain the strings (I don't want the ball end of the strings standing proud of the back for comfort reasons).


I might use one on the front as well rather than string ferrules but that is yet to be decided.  The metal plate might be too thin and cause the strings to break under tension.

Wednesday 11 June 2014

DLP Lap Steel Guitar - 2 - Cutting the Body Blanks

I decided to create two Lap Steel Guitars from the blank and set about cutting the bodies from the blanks.  First I used a handheld circular saw to cut the blank in half allowing me to fit each half comfortably on the band-saw table.  This is the first real test for my band-saw as Cherry is a heavy dense wood.  I found that I  had to make lots of relief cuts and take off small chunks of wood rather than expecting to cut everything in one go.


I will have two contrasting bodies cut from the same piece of wood, one shows more of the lighter grain than the other and will complement the mahogany fret board while the other has more of the darker grain which will look great against the pine fret board.


One I had roughly cut the two bodies from the blank using the band saw I concentrated on smoothing up the edges.  first of all I screwed the template to the top of one of the bodies and used a template bit on my router to take away excess material left from the band-saw.


I then used a drum sanding attachment on my drill press and started smoothing out the machine marks left by the router but, I had to rout in 3 passes because the bit is not large enough to cover the sides in one pass.


One of the bodies is now totally smooth  and flat on the top, bottom and sides so I took a moment to trim the mahogany fret board to size using a hand plane.  I have to repeat the process with the other body now before turning my attention to the head.  I want to have the head leaning backwards like a Les Paul style guitar so I have to think of  a precise and easy way of achieving the angled cuts I need to make.

Sunday 8 June 2014

DLP Lap Steel Guitar - 1 - Design Ideas

I was recently  inspired by a fellow luthier to start a Lap Steel Guitar.  I had never considered making one before but he made it look so easy!  For starters, unlike a regular guitar, the body and neck can be made out of one piece of wood.  It wont need frets, or a contoured neck.  It wont need a radius on the finger board or a truss rod in the neck.  So I started to research different styles and set about designing a DLP Lap Steel Guitar. 


The simplest Lap Steel design is a plank of wood with strings suspended above a pickup and while I like the idea of a minimalist design I still want to put a little of my personality into the finished DLP design.   With that in mind I thought about the headstock design I have already used on previous builds and decided to mirror it in the body shape.  I decided on using a 22 1/2 scale which lets me have a proportionally smaller body than I would normally use on a larger scale guitar.


Once I was happy with the design I drew up a full scale plan and then cut it out in hardboard.  I can either route round the edge of just use it to draw an outline for the band saw knowing I can re-use the template over and over again.  I plan to install a P90 pickup, I also plan to use regular machine heads mounted as though they were on a regular guitar.  I will install one volume and tone control and try and keep the nut and bridge as simple as possible and I am considering through body strings at the bridge end much like a fender Telecaster.


With the template cut out and the sides smooth and straight I put it to one side and paid a visit to the local sawmill to look at wood for the body.  I need something at least 3' tall and about 10" wide and 2" thick.  I finally settled on a nice piece of cherry.


I marked the centre of the plank and cut it in half.  laying the two boards next to each other gives me some idea of how the template would lay out next to the figuring of the wood.  At this point I looked at the amount of waste I would produce if I laid the template in the middle of the board and while ascetically the body would look the best, in practical terms I realised I can make two bodies out of this blank.  There are some splits in the ends of the board so I was careful to avoid them.


Before I joined the two boards I ensured both glue surfaces were flat and square by sanding them on a flat piece of glass with sandpaper stuck to it with double sided tape.


I used wood glue and carefully joined the two edges wiping away excess glue with a damp cloth.


I will leave this all clamped overnight and remove the clamps in the morning leaving everything to set for 24 hours before doing any more work on the blank.


Meanwhile I took a piece of mahogany and cut a blank for the fret board.  I plan to slot the board and glue in plastic strips to mark what would normally be the fret positions on a regular guitar.  I should end up with 24 or 25 frets on the 17 inch blank.  The blank it's self started off about 1/2" thick and I want it to be about 1/4" thick so I planed away the excess material and then sanded the face flat on my 'sandpaper on glass' setup!


So I have the potential to make 2 DLP Lap Steel guitars out of this blank but the more I look at the 2 boards glued together the more I think of the lovely book matched guitar tops I have see and start imagining one or maybe two guitar bodies in the making...